 QuickMerge
Compress PDF with Clear Quality Controls
Short answer: To compress a PDF without making it unnecessarily blurry, choose a balanced quality setting and compare the smaller result before using it. QuickMerge processes the PDF locally in your browser, not on a server.
Reduce a PDF's file size using the controls below, with the trade-off visible rather than hidden behind a "recommended" preset. Compression runs in your browser and the source PDF is not uploaded — which matters, since the files people most need to shrink are usually the ones they least want to send anywhere.
How do I reduce the file size of a PDF?
Drag & drop PDF file
or click to browse (Supports PDF files only)
Pages are re-rendered at the selected DPI, so text becomes part of the page image. Works best for scanned or image-heavy PDFs. If the result would be larger than the original, we keep your original file.
With a target set, the tool compresses repeatedly at decreasing quality and stops at the first result under your number, reporting the resolution it settled on. Some documents cannot reach a small target at any quality — mostly text and vector PDFs, which have little image data to remove. When that happens you get the smallest version it managed and a note saying so, not a silent failure.
Compression Results
Original File
File size before compression
Compressed File
File size after compression
Size Reduction
Space saved
How to Compress a PDF Without Uploading It Anywhere
A heavy PDF is usually the result of high-resolution scans, photographs embedded at full camera resolution, or pages that were exported straight from a phone or flatbed scanner. This compressor tackles that bloat directly in your browser: it opens the PDF with pdf.js, re-draws every page onto a canvas at a resolution you choose, and rebuilds a fresh document with pdf-lib. Because the heavy lifting runs on your own machine, even a 200 MB file is processed without a single byte being sent to a server, and there is no queue, no account, and no watermark waiting at the end.
One detail worth understanding up front: this tool re-renders each page to a JPEG image at the chosen DPI, then places that image back into a page of the original dimensions. That approach is what makes scanned and image-heavy documents shrink dramatically. It also means that on a born-digital PDF that is mostly crisp text, the smartest result is sometimes no rasterization at all — so the tool additionally attempts a lossless re-save (using object streams) that preserves selectable text, and then keeps whichever version is smallest. If even that comes out larger than what you started with, your original file is returned untouched and you will see a 0% result rather than a bloated download.
Step-by-Step: Compressing Your First PDF
- Add your file. Drag a PDF onto the drop zone or click it to browse. Only one PDF is processed at a time, and it must be under 200 MB.
- Pick a compression level. High Compression renders pages at 72 DPI for the smallest size, Balanced uses 150 DPI (the recommended default for most documents), and Low Compression keeps 300 DPI for print-grade clarity.
- Click "Compress PDF." A progress bar shows each page being re-rendered, so you can tell roughly how long a large document will take.
- Review the results. The results panel shows your original size, the compressed size, and the exact percentage saved side by side.
- Download. Click "Download Compressed PDF" to save the new file. It keeps your original filename with a
compressed-prefix so you never overwrite the source.
Choosing the Right Compression Level
The three levels map to a render resolution and a JPEG quality setting, and the best choice depends entirely on what the PDF will be used for:
- High Compression (72 DPI): The smallest possible file. Ideal for emailing a receipt, attaching a multi-page scan to a web form, or archiving documents you only ever read on screen. Fine print may soften slightly, so it is not the right pick for documents that must be printed.
- Balanced (150 DPI): The recommended middle ground. Text stays sharp on a typical screen, scanned pages remain clearly legible, and the size reduction is still substantial. Use this when you are unsure.
- Low Compression (300 DPI): Print-quality output. Choose this when the PDF will be physically printed or contains detailed diagrams, signatures, or fine artwork that must survive a closer look. The file will be larger than the other two levels but still leaner than a full-resolution scan.
Why Scanned PDFs Shrink More Than Text PDFs
A scanned PDF is essentially a stack of photographs of paper. Each page is one large bitmap, often captured at 300 DPI or higher and stored with little compression, which is why a ten-page scan can balloon past 30 MB. Re-rendering those pages at 150 or 72 DPI and saving them as optimized JPEGs throws away resolution your eyes do not need, so reductions of 60–90% are common. A born-digital PDF — one exported from a word processor or design program — is the opposite: its text is stored as compact vector instructions that are already tiny. Rasterizing that text would actually make the page bigger and blurrier, which is exactly why the tool falls back to a lossless re-save and keeps your original when rasterization does not help.
When to Use PDF Compression
- Beating email attachment limits: Gmail, Outlook, and most providers cap attachments around 20–25 MB. High or Balanced compression usually brings a scan comfortably under that line.
- Government and job-application portals: Many upload forms reject anything over 2–5 MB. Compressing a scanned passport, transcript, or tax form lets it through.
- Reducing cloud storage and backups: Smaller PDFs mean faster syncs and less space used across Drive, Dropbox, or local archives.
- Faster sharing and loading: A lighter PDF opens and downloads quicker for the person on the other end, especially on mobile data.
Tips and Best Practices
- Try Balanced first. It solves most size problems without a visible quality hit. Only drop to High Compression if you still need a smaller file.
- For very large documents, split before you compress. If a single PDF is near the 200 MB ceiling or has hundreds of pages, separating it into smaller files first keeps your browser responsive and makes each compression pass faster.
- Keep your original. Because compression is one-way for image quality, hold on to the source file until you have confirmed the compressed version looks right.
- Re-test if you get 0%. A 0% result means the file was already efficiently stored. Switching to High Compression often unlocks savings on image-heavy pages that Balanced left alone.
Common Problems and Troubleshooting
- "File size must be less than 200MB." The selected file is over the limit. Split it into sections and compress each one separately.
- The result is 0% smaller. The PDF is already near-optimal. Try a more aggressive level, or accept that little can be removed from a lean, text-only document.
- Selectable text became an image. When rasterization wins on size, page text becomes part of the page picture and is no longer selectable or searchable. If you need searchable text, keep the original or use a level that triggers the lossless re-save.
- The page seems stuck. Very large or high-page-count files take time to re-render one page at a time. Let the progress bar finish rather than reloading; closing the tab cancels the job since nothing is stored remotely.
How It Works in Your Browser
Everything happens client-side. When you add a file, JavaScript reads it into memory using your browser's File API; pdf.js decodes and paints each page to a hidden canvas at the resolution you selected, and pdf-lib assembles those pages into a new PDF saved with object streams. The original page dimensions in PDF points are preserved, so the compressed document prints at the same physical size. No upload request is ever made, which means your contracts, medical records, and financial statements never touch a third-party server. Close the tab and the file is gone from memory entirely.
Next steps
Before this step
- extract only the pages you need — often a bigger saving than compression alone.
- remove embedded metadata — a small saving that also strips author and software details.
Related tools
- resize the pages instead — when the problem is the page dimensions rather than the file size.
- compress the images first — when the PDF is mostly photographs.
Guides
- how to reach 500KB, 1MB, 2MB or 4MB — and what quality you give up at each target.
Browse all PDF tools, or see every QuickMerge tool.
Historical test results: see the measured compress pdf results. These are examples from one machine, not a file-size guarantee. Browser test coverage.
A checked example
Synthetic examples checked in Chromium on Linux, September 9, 2026. The HEIC input is a licensed sample.
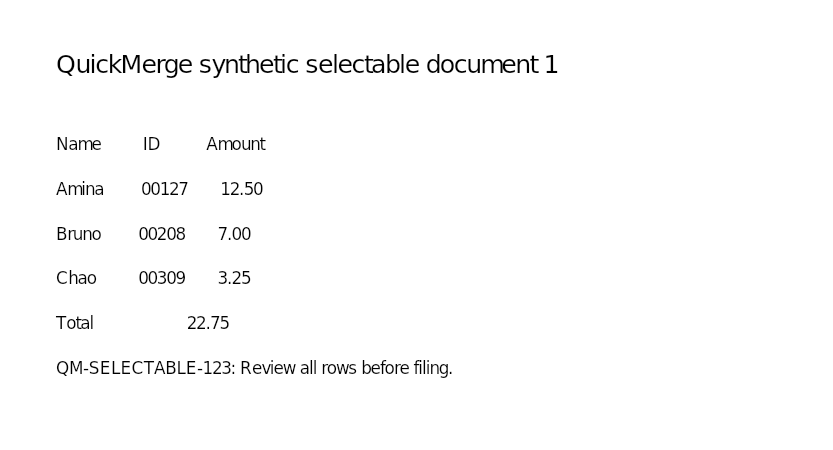
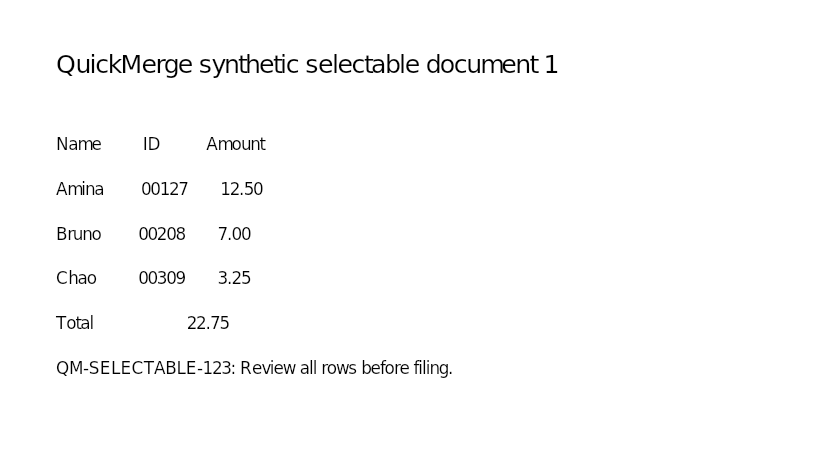
The two-page text PDF was already 1,675 bytes. With a 200 KiB target, the tool kept the original unchanged at 1,675 bytes; searchable text remained. Saved result. This is a useful no-reduction result, not a compression benchmark.
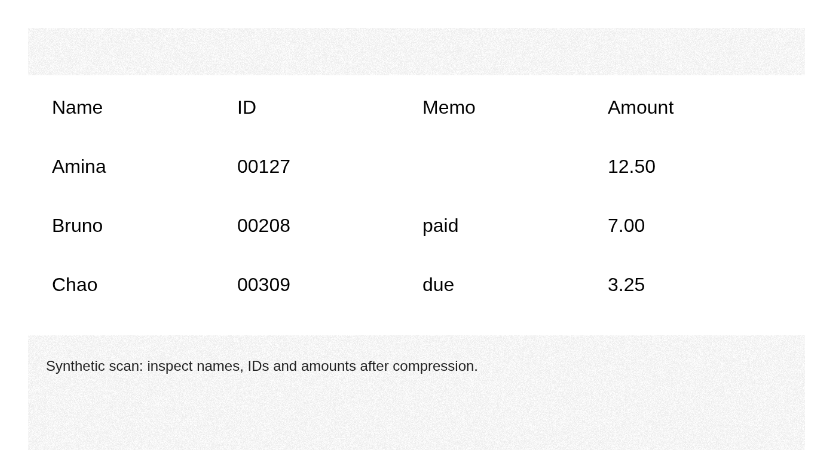
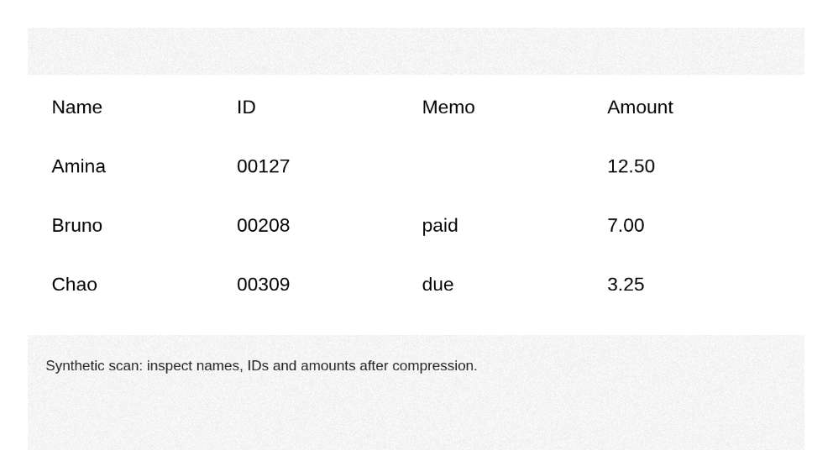
Compare the source crop and the saved crop. The separate synthetic scan-heavy PDF was 1,736,913 bytes. With the same 200 KiB target, the saved image PDF was 103,159 bytes with two pages. Neither contains searchable text. Compare the scan source crop and its compressed crop before choosing this route for small print. The compressed crop has visibly softer letter edges, although the displayed names, IDs and amounts remain readable in this example.
Frequently Asked Questions
It depends on the level and the document. Pages that get rasterized are re-rendered at the DPI you select, so High Compression visibly softens fine detail while Low Compression stays print-sharp. For text-only PDFs the tool prefers a lossless re-save that does not change quality at all. Choose Balanced for the best trade-off in most cases.
Image-heavy and scanned PDFs often shrink by 60–90%, because their pages are full-resolution bitmaps with a lot of redundant detail. Lean, text-only documents may shrink only slightly or not at all, since their content is already stored very efficiently.
The tool never hands back a file larger than the one you gave it. If neither rasterizing nor a lossless re-save produces something smaller, it returns your original unchanged and reports 0%. That usually means the PDF is already well optimized. Try High Compression if the document contains photos or scans.
No. The entire process runs locally using pdf.js and pdf-lib inside your browser. Your file is never transmitted to a server, which makes the tool safe for confidential contracts, legal filings, and personal records.
Yes, it runs in any modern mobile browser. Because rendering uses your device's memory, very large or high-page-count files will be slower on a phone than on a desktop. For big jobs, a laptop or desktop will finish faster.
Yes. The tool preserves each page's original dimensions in PDF points, so an A4 or Letter page stays exactly that size. Only the resolution of the page content changes, never the physical layout.
Compare bytes and required document features
Choose a compression route based on what the recipient must still be able to do.
Lossless optimization can save little
Rewriting PDF structure may reduce overhead while retaining visible text and images. Already efficient documents may barely change. Inspect forms, links and signatures separately; a smaller size does not prove that all document-level features survived.
Raster compression creates image pages
Rendering reduces the document to pixels. Lower resolution and lossy image encoding can reduce bytes but can also blur small text and remove selection or interactive features. Work from the original on every attempt.
Targets are attempts, not guarantees
Read the receiving service’s current byte limit. Choose the target and inspect the reported mode and actual output bytes. The tool can retain the original or a re-saved PDF when those are smaller than a raster result.
Check the demanding area
Reopen the download, count pages and inspect fine text, decimals and signatures. Try selecting a sentence if searchability is required. Keep the original when the target cannot be reached without losing useful detail.