 QuickMerge
Using the current size-target control
In the compressor, choose a preset or select a value under “Or aim at a file size.” The 200 KB option targets 204,800 bytes. It tries up to seven image settings, from 200 to 48 DPI, then compares the image output, a re-saved PDF and the original. The results identify the output type and whether the target was reached. Selecting a preset clears a previous target.
After downloading, confirm the actual byte size and zoom into small text. A target miss is useful feedback: try removing unnecessary pages or returning to the source document instead of making required text unreadable.
A smaller PDF is useful only if the recipient can still read and use it. Before compressing, decide whether the file needs selectable text, form fields, links or certificate validation. Those requirements determine which compression route is acceptable.
Find what is making the PDF large
Photographed pages and high-resolution scans often dominate size. A text-based report may already be efficient, especially if its images were optimized at export. Check the actual file size and page count, then look for a detailed image page that can serve as a quality test.
If the source Word or design file is available, compare a new PDF export with appropriate image settings. If the recipient only needs part of the document, extracting a range can reduce the delivery size without degrading those pages.
Choose lossless optimization or raster compression
Compress PDF offers different approaches. Lossless optimization rewrites the PDF structure and can preserve more of its existing content, but may achieve little on an already optimized file. It does not promise that every document-level feature is unchanged.
Raster compression renders each page to an image and builds a new PDF. It can reduce scan-heavy files, but the output sacrifices selectable text and interactive features. Choose it only when a visual copy is acceptable. Keep signed or fillable originals separate.
Measure the result and inspect the hardest page
- Select the original PDF and choose the appropriate mode.
- Set the available quality or size target, then run compression.
- Compare the output’s actual bytes with the original and the receiving service’s limit.
- Open the download and inspect small text, thin lines, signatures and detailed images. Test the required interactive features separately.
Respond honestly when a target is too small
Compression targets are attempts. The number of pages, image complexity and minimum usable detail limit what can fit. A file may become larger after re-encoding, especially when the original was already compact. Keep the smaller original when the new output provides no useful saving.
Never keep feeding a compressed copy back through the tool to chase a lower number. Start each trial from the original and compare results. If a required set of pages cannot fit legibly under the limit, ask the recipient for an alternative instead of submitting a damaged document.
Sources and checks
When a document is still available in Word, compare its Minimum size PDF export with a re-rendered copy. Retaining the source gives you another way to reduce the file without repeatedly compressing the same output. Microsoft: saving Office files as PDF.
A checked example
Synthetic examples checked in Chromium on Linux, September 9, 2026. The HEIC input is a licensed sample.
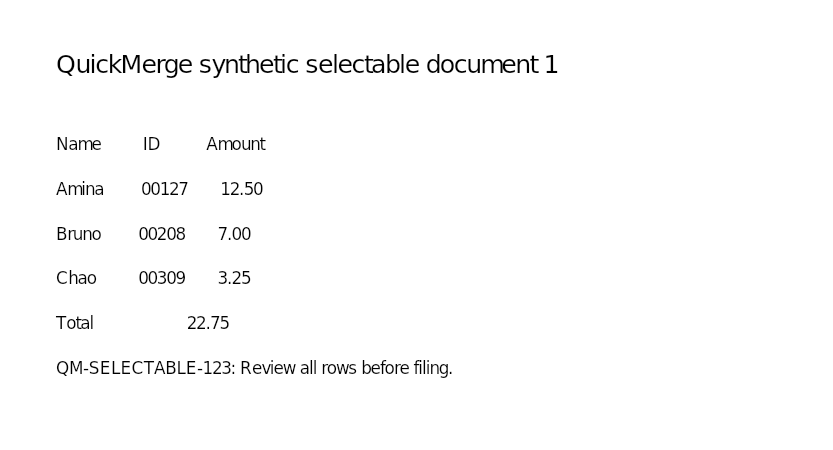
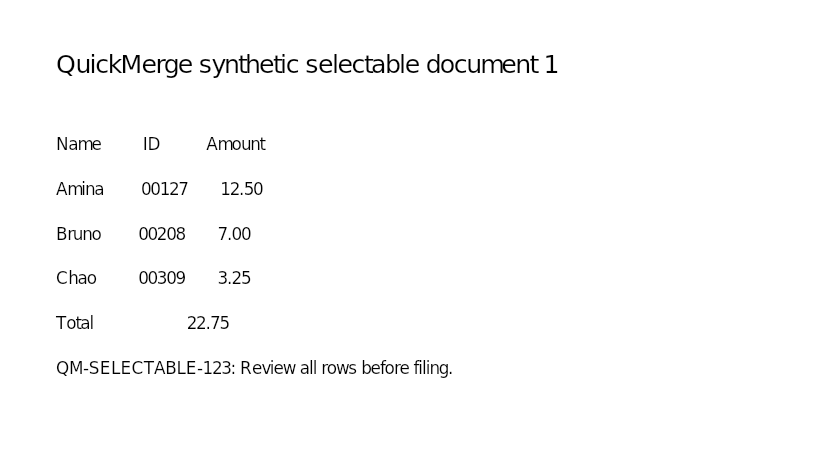
The two-page text PDF was already 1,675 bytes. With a 200 KiB target, the tool kept the original unchanged at 1,675 bytes; searchable text remained. Saved result. This is a useful no-reduction result, not a compression benchmark.
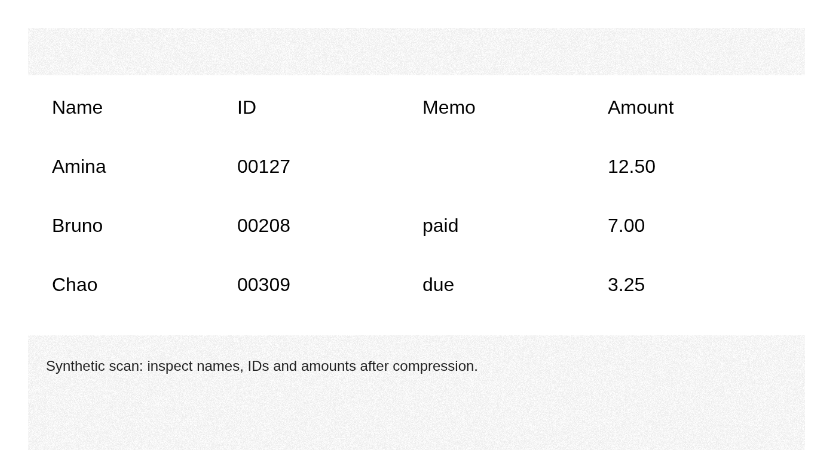
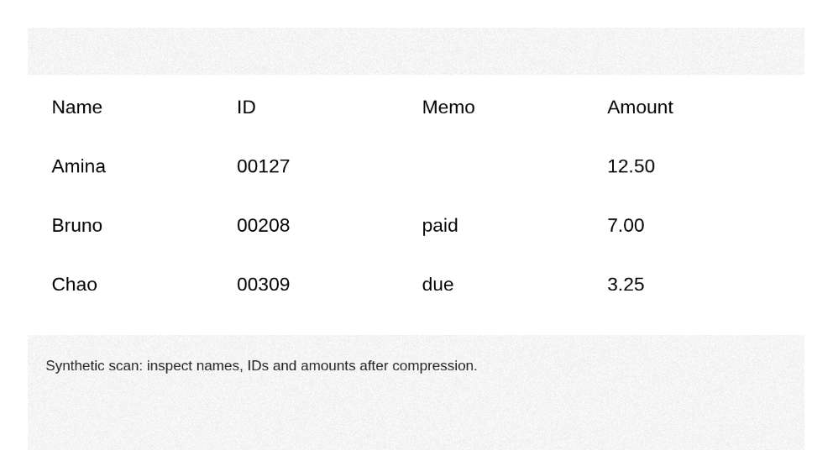
Compare the source crop and the saved crop. The separate synthetic scan-heavy PDF was 1,736,913 bytes. With the same 200 KiB target, the saved image PDF was 103,159 bytes with two pages. Neither contains searchable text. Compare the scan source crop and its compressed crop before choosing this route for small print. The compressed crop has visibly softer letter edges, although the displayed names, IDs and amounts remain readable in this example.
Frequently asked questions
Why can I no longer select text?
Raster compression creates image pages. Use the lossless route or a new export from the authoring file when selectable text is required.
Why did the output barely shrink?
The source may already be efficient, or most of its size may be content that the selected mode preserves. A fixed percentage saving cannot be guaranteed.
Does a smaller PDF preserve digital signatures?
Size alone says nothing about signature validation. Retain the signed original and check any changed copy in a signature-capable viewer.
Before you finish
Use the checks above on the saved result before replacing your original.
Content revised .
Added inspected example outputs and corrected the relevant workflow limitations.

Maintained by Mehran
Founder of QuickMerge. Responsible for this guide and its corrections. Connect on LinkedIn.
Spotted an error? Report a correction. How these guides are written, tested and cited is set out in the editorial policy.